WarpSpeed makes it super easy to provision a server with just what you need. WarpSpeed currently supports Linode and Digital Ocean. If you haven’t already set up your accounts and configured your API Keys within WarpSpeed, please do so before proceeding.
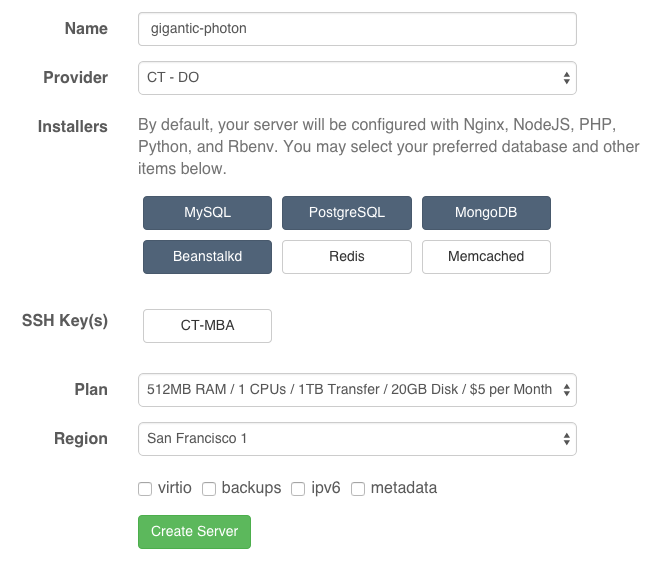
Access your “My Servers” dashboard and click the “Create Server” button and you will see a screen that looks like this:
A server name is auto generated, but feel free to change it. Just use alphanumeric characters with dash separators.
Choose a provider. The options available to you here will be based on the API Keys you have configured for your account.
Select the installers you would like to run.
Select SSH Keys to add to the server. The options available to you here will be based on the keys you have configured for your account. Since WarpSpeed only allows key-based authentication, you must select at least one key.
Choose your plan and region for your server host. The prices here are related to your configured server provider and you will be billed for hosting directly from your provider. The options available here should be the same as if you went directly to their site.
If you desire any additional features from your provider, select the appropriate checkboxes. It should be noted that some providers charge additional fees for certain features, such as backups. Also, all features are not available in all regions.
Verify all your inputs, then click the “Create Server” button. You will be able to track the status of the new server on your “My Servers” dashboard. When setup is complete (usually 5-10 minutes), you will receive an email containing the relevant login information for your server.